Taking My Own Medicine: Daguerreotypes

Half Plate (clad) Daguerreotype. Quinn Jacobson 2012Once again, I’m faced with a chapter of my life closing and wondering what to do next.

 In a couple of weeks, Jeanne and I will be back on the plane headed to Paris. We’ll teach some workshops, maybe do some portraits, and then close the exhibition. I’m looking forward to all of that, but I’m also thinking about what’s next.

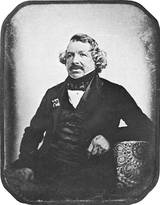
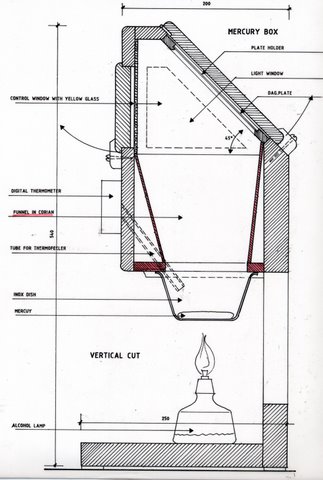
 In 2010, I started working in the Daguerreotype process. My friend, and photographer, Rene Smets (Belgium), built all of my equipment. My goal was to make a body of work for the 2014 anniversary (the 175th, also known as the Terquasquicentennial) of the Daguerreotype; 1839 – 2014. I've been thinking that this is something that would be nice to "highlight" that year. However, I'm not sure that's where my heart and head should be. 

 This is still a bit of a struggle for me. I’m finding myself over analyzing all of my motives, thoughts, and ideas. In other words, I’m not sure if I care enough about the anniversary to make a body of work. I would prefer that I make a body of work and it just so happens to be an anniversary of the process that I’m working in. There's far too many people making photographs for the wrong reasons. This is creating a lot of "noise" in the historic photographic world, at least it is for me. I'm not sure we need anymore parties about the processes, we need people making serious work. 

 The other part of the problem is that Paris seems to be more interested in Joseph Nicéphore Niépce than in Daguerre. And if you see anything about Daguerre in Paris it’s usually something to do with his diorama work. I’m not saying the work wouldn’t be received well, but I have my doubts about how effective it would be in raising awareness for the anniversary. Just typing this I’m realizing that I shouldn’t be making work based on that event.

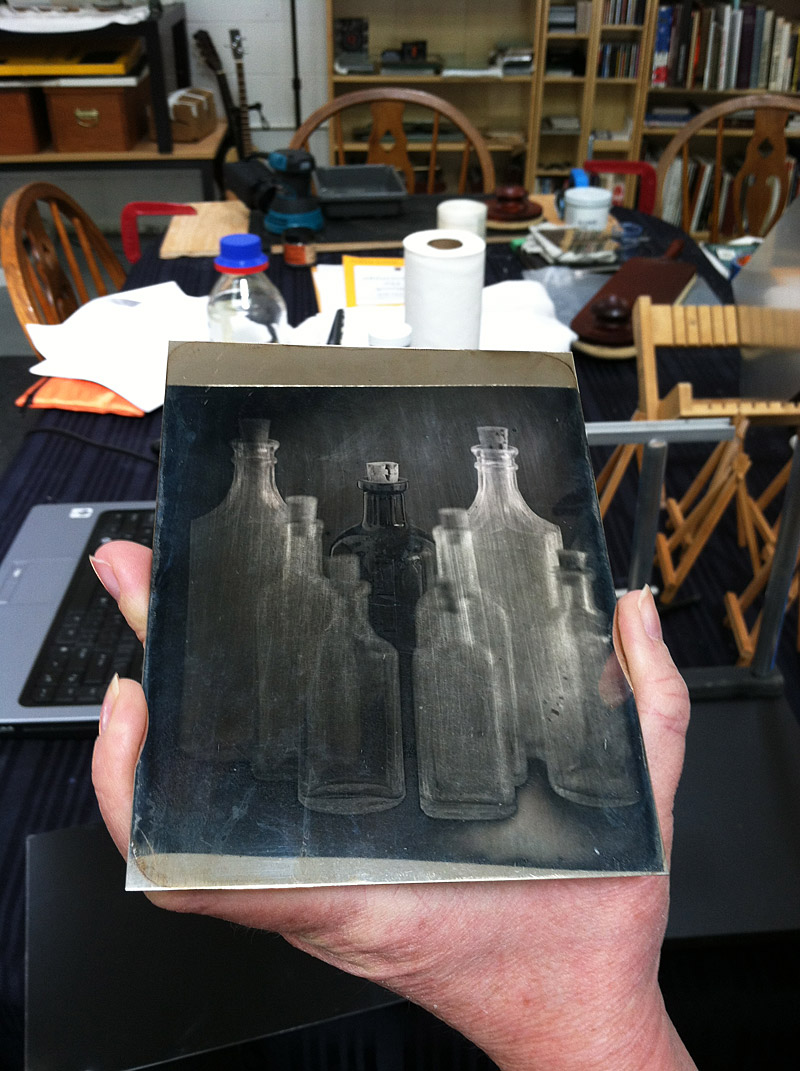
 I’m making Daguerreotypes in my studio in Denver now. I just (in the last week) got the go ahead for Hg levels in my darkroom. I had a mercury vapor test run for a couple of days and the results say that I’m way below the OSHA and NIOSH permissible exposure level. I’ve spent a lot of time and money getting setup here to do this. It’s on my docket to make happen, but I need some quiet, uninterrupted time to think about what I want to do and WHY! If I feel good (and authentic) about my conclusion, I think I’ll have a Daguerreotype show in 2014. If not, I might retire. 

2014: The 175th Anniversary of the Daguerreotype

The Daguerreotype

By Mary Bellis
Daguerreotype Portrait of Louis Daguerre (1787–1851) Photographer Jean-Baptiste Sabatier-Blot 1844
Louis Daguerre, inventor of the first practical process of photography. Louis Daguerre (Louis Jacques Mande Daguerre) was born near Paris, France on November 18, 1789. A professional scene painter for the opera with an interest in lighting effects, Daguerre began experimenting with the effects of light upon translucent paintings in the 1820s.
Louis Daguerre regularly used a camera obscura as an aid to painting in perspective, and this led him think about ways to keep the image still. In 1826, he discovered the work of Joseph Niepce, and in 1829 began a partnership with him.
He formed a partnership with Joseph Niepce to improve upon the photography process Niepce had invented. Niepce, who died in 1833, produced the first photographic image, however, Niepce's photographs quickly faded.
After several years of experimentation, Louis Daguerre developed a more convenient and effective method of photography, naming it after himself - the daguerreotype.
According to writer Robert Leggat,"Louis Daguerre made an important discovery by accident. In 1835, he put an exposed plate in his chemical cupboard, and some days later found, to his surprise, that the latent image had developed. Daguerre eventually concluded that this was due to the presence of mercury vapour from a broken thermometer." This important discovery that a latent image could be developed made it possible to reduce the exposure time from some eight hours to thirty minutes.
Louis Daguerre introduced the daguerreotype process to the public on August 19, 1839 at a meeting of the French Academy of Sciences in Paris.
In 1839, Louis Daguerre and Niépce's son sold the rights for the daguerreotype to the French government and published a booklet describing the process.
In 2014, the world will celebrate the 175th anniversary of the Daguerreotpye. I will be in Paris, at the Centre Iris Gallery, with a body of work celebrating and honoring Daguerre and the process. My exhibition will run from March to June, 2014. If all goes well, I will be making Daguerreotypes at Centre Iris and offering to do some commisioned portraits. It's a long way off still and there's a lot of preparation and work still to do, we'll see what happens. I may even offer a Daguerreotype workshop. 

Mercury Pot

So here we are, at the heart of the operation. Although you can fail miserably before this step, this piece of equipment is critical to calculate both time and temperature. I'll post on safety in a different entry, let's just say that you do not use this unless it's in a well-designed, vented, tested, fume hood.

After the plate is polished, fumed and exposed, it comes to this unit. Here. the plate is fumed again but this time with heated mercury - Hg. There are many methods, times and temperatures, but the general rule is 100 C (212 F) for 2 minutes. The mercury is heated with an alcohol lamp - this is quicker and the "cool down" is quicker, too. I have nothing against electrical heaters for mercury - if that's what you like, go for it.

With René's design, I can inspect the plate through the "safe windows". Again, you can do this by time and temperature only, and a lot of people do, I prefer the visual, if I can get it.


All material © 2010 Studio Q - Quinn Jacobson Photography and René Smets.

 Designed and built by Rene Smets.


Trays & Pans

You might ask why are you posting on trays and pans? Good question! I'm doing this because of the unique construction (addtion, really) that Rene's trays come with.

The little "lift" in the tray really helps the Daguerreotypist from damaging the plate when trying to lift it out of the tray. Fingernails and fingers damage the (tender) surface easily!

 I highly recommend this design if you do it. The plastic strips in the bottom of the tray act as ribs to keep the plate from "sticking".

Everything you need for trays in Daguerreotypy. Whole Plate and Half Plate dummies sit inside the trays.

Fuming or Sensitizing Boxes

This part of the Daguerreotype equipment is very important (but then again, what part isn't?). This is where the plate is sensitized, or becomes like film - sensitive to light. The final surface is an amalgum of silver and mercury. The first fuming is over Iodine Crystals. The plate is fumed until you have a rose color (checked under reflected white light and fumed again for a few seconds to mitigate that exposure) and then it's off to the Bromine for fuming. No Bromine fume, no "speed" or ISO.

These are very special fuming boxes. They are designed with NO metal in them and to seal extrememly well when fuming and in storage.


Iodine and Bromine Fuming Boxes

Detail of the Iodine Box - designed and built by Rene Smets.

In the "fuming" position.

In the "resting" position.Open top anc slide on the Iodine Box. These are the Corian boxes that store the Iodine and Bromine. These are "sealed" for storage.

Detail of the "sealed" storage box with handle!

I needed three sets of inserts; Iodine, Bromine and Mercury - Whole Plate and Half Plate size. This is why I decided to go with the "Lift System" versus the "Vise System". You can see the "gaps" and issues with the "Vise System".

Gilding & Drying Stand

People always want to know waht the most difficult part of making Daguerreotypes is - the answer is gilding.  There seems to be some correlation to the varnishing step in Wet Collodion and Gilding in Daguerreotypy. It's a strange and difficult thing to explain in writing. These are all visual processes, every step, you watch and adjust. It's visual and intuative.

Rene designed a "traditional" Gilding Stand for me with the built in feature of being a Drying Stand, too. See the photos/illustrations. Rene thought that this was a better option than using BBQ tongs. I'm also making larger plates - Whole Plates won't fit in BBQ tongs.

Gilding Stand/Drying Stand - this will accommodate both Whole Plate and Half Plate sizes. The drying stand post is removed and the left gilding post is moved into its place and the rack supports Half Plate. In this configuration, it supports Whole Plate. A "Whole Plate" sitting on the Gilding Stand with catch pan for when the meniscus breaks.

Here you see an illustration of me "working the stand". I wish I would have put my pony tail a little higher on my head, but this was in Belgium, and that's the custom there.

The Drying Stand holding a Whole Plate piece of glass.

Electroplating Box

Making Silver Plates for Daguerreotypy:

There a couple of ways to go about covering the copper plate with silver. The first way is to send the polished and preped copper plates to a plater. There are several good ones in the United States. Search the FAQ database for those. The second way, the way that keeps you independent is cladding or electroplating the copper plates. I've chosed electroplating.

I haven't found a lot of good information on this topic online. You can search the FAQ database for specifics, but the general idea is that you use an anode (pure silver plate) and cathode (copper plate) in a solution of silver and cyanide. An electrical current is sent through the plates and the silver is transferred and "plated" onto the copper - electroplating.

This is my electroplating tank and plate hangers:

Whole Plate Electroplating Tank designed and constructed by Rene Smets.

Plans for the plate hangers - holds Whole Plate and Half Plate.

Cathode Hanger - Holds Whole Plate and Half Plate.

Copper Plate Preparation

I am going to publish a series of posts about the Daguerreotype equipment that René Smets of Lummen, Belgium built for me.

All of this equipment is all based on his design and his work. Of course, I told him what I wanted and customized it where I could. And I gave feedback throughout the project, but the credit goes to René.

All material is copyright © 2010 Studio Q - Quinn Jacobson Photography and René Smets.


The plan showing how the Copper Polishing Vise will be used.

 Copper Plate Vise - this is an important piece of equipment. The surface of the copper plate dictates, to a large extent, the quality of surface that you will have on the silver plate.

Daguerreotypes in Belgium

René's Mercury Pot DesignJeanne and I made a trip to Belgium over the weekend. It was very nice. The Belgian countryside is beautiful. I'll miss the small European villages; quiet, clean, great food and drink and wonderful people.

We were invited to René Smets' house to talk and to make Daguerreotypes. René is building me some Daguerreotype equipment; fuming boxes, buffing block, gilding stand and mercury pot. His designs are top-rate. And as a retired architect, this type of thing is right down his alley.

In attendance were René, his wife, Annie, Jacques and Jeroen. Our friend, Kal from Brussels made a brief appearance, too. A great group of people! Annie kept us in food and coffee as we explored René's unique setup for making Daguerreotypes.

Rene's mercury pot.Typically, when making Daguerreotypes, you would have two fuming boxes (iodine and bromine) and a mercury pot under a fuming hood in a darkroom. Not René, he built his fuming boxes to take a modern film holder (4x5) and fume by time. Although, you can take the holder to the darkroom and check for color. We made plates outside on his garden patio. It's a very cool system and works well.

His mercury pot (one of them) uses visual inspection for development. It has two little safe windows; one to look at the plate and one for light. With his  other mercury pot, development done only by time, no visual inspection.

I brought some 4x5 plates, but we had a difficult time preparing them. I don't think we cleaned/buffed the first plate well enough. It had only a faint image. Moreover, René's iodine crystals were weak. I think that gave us problems, too. We replaced his crystals with mine (fresh/new) and voilà, the magic of the Daguerreotype! Of course, not a perfect plate, but we were working with limited time and had other things to discuss (my equipment). It was fun and rewarding.

When I return to the United States, I will be making Half Plate and Whole Plate Daguerreotypes. I'll have everything here (except a fume hood) when René completes this equipment. So I will leave Europe ready to make plates. Daguerreotypes are the first in the processes of The '39-'89 Project I'm working on now. I'm very excited about the next couple of years!


René's fuming box - both iodine and bromine and he can spin the plate around for a more even coating.

15 mins at f/22

The Daguerreotype being held with BBQ tongs to dry it.Jeanne watches as René plugs the Hg pot.
The working table.

The end result - a 4"x5" Daguerreotype